Jag köpte en altfiol från Yita Musik i Kina för några år sedan. Priset låg då på kanske 250 dollar. Fiolen har spelats av olika musiker, också proffs, och kommentarerna har allmänt taget varit rätt positiva. Instrumentet är välbyggt och ljudet är rätt skapligt men absolut inte perfekt. Jag fick nyligen tillbaka instrumentet och beslöt att titta på det igen och naturligtvis göra vissa justeringar. Jag vet att följande detaljer aldrig har justerats:
- Bottenplattan har aldrig stämts genom inre slipning
- Locket har aldrig stämts via inre slipning
- Stallet har aldrig värmebehandlats
- Stallet verkar rätt tjockt upptill baserat på mina nuvarande erfarenheter
Jag beslöt att justera bottenplattan och stallet men locket skulle inte röras denna gång.

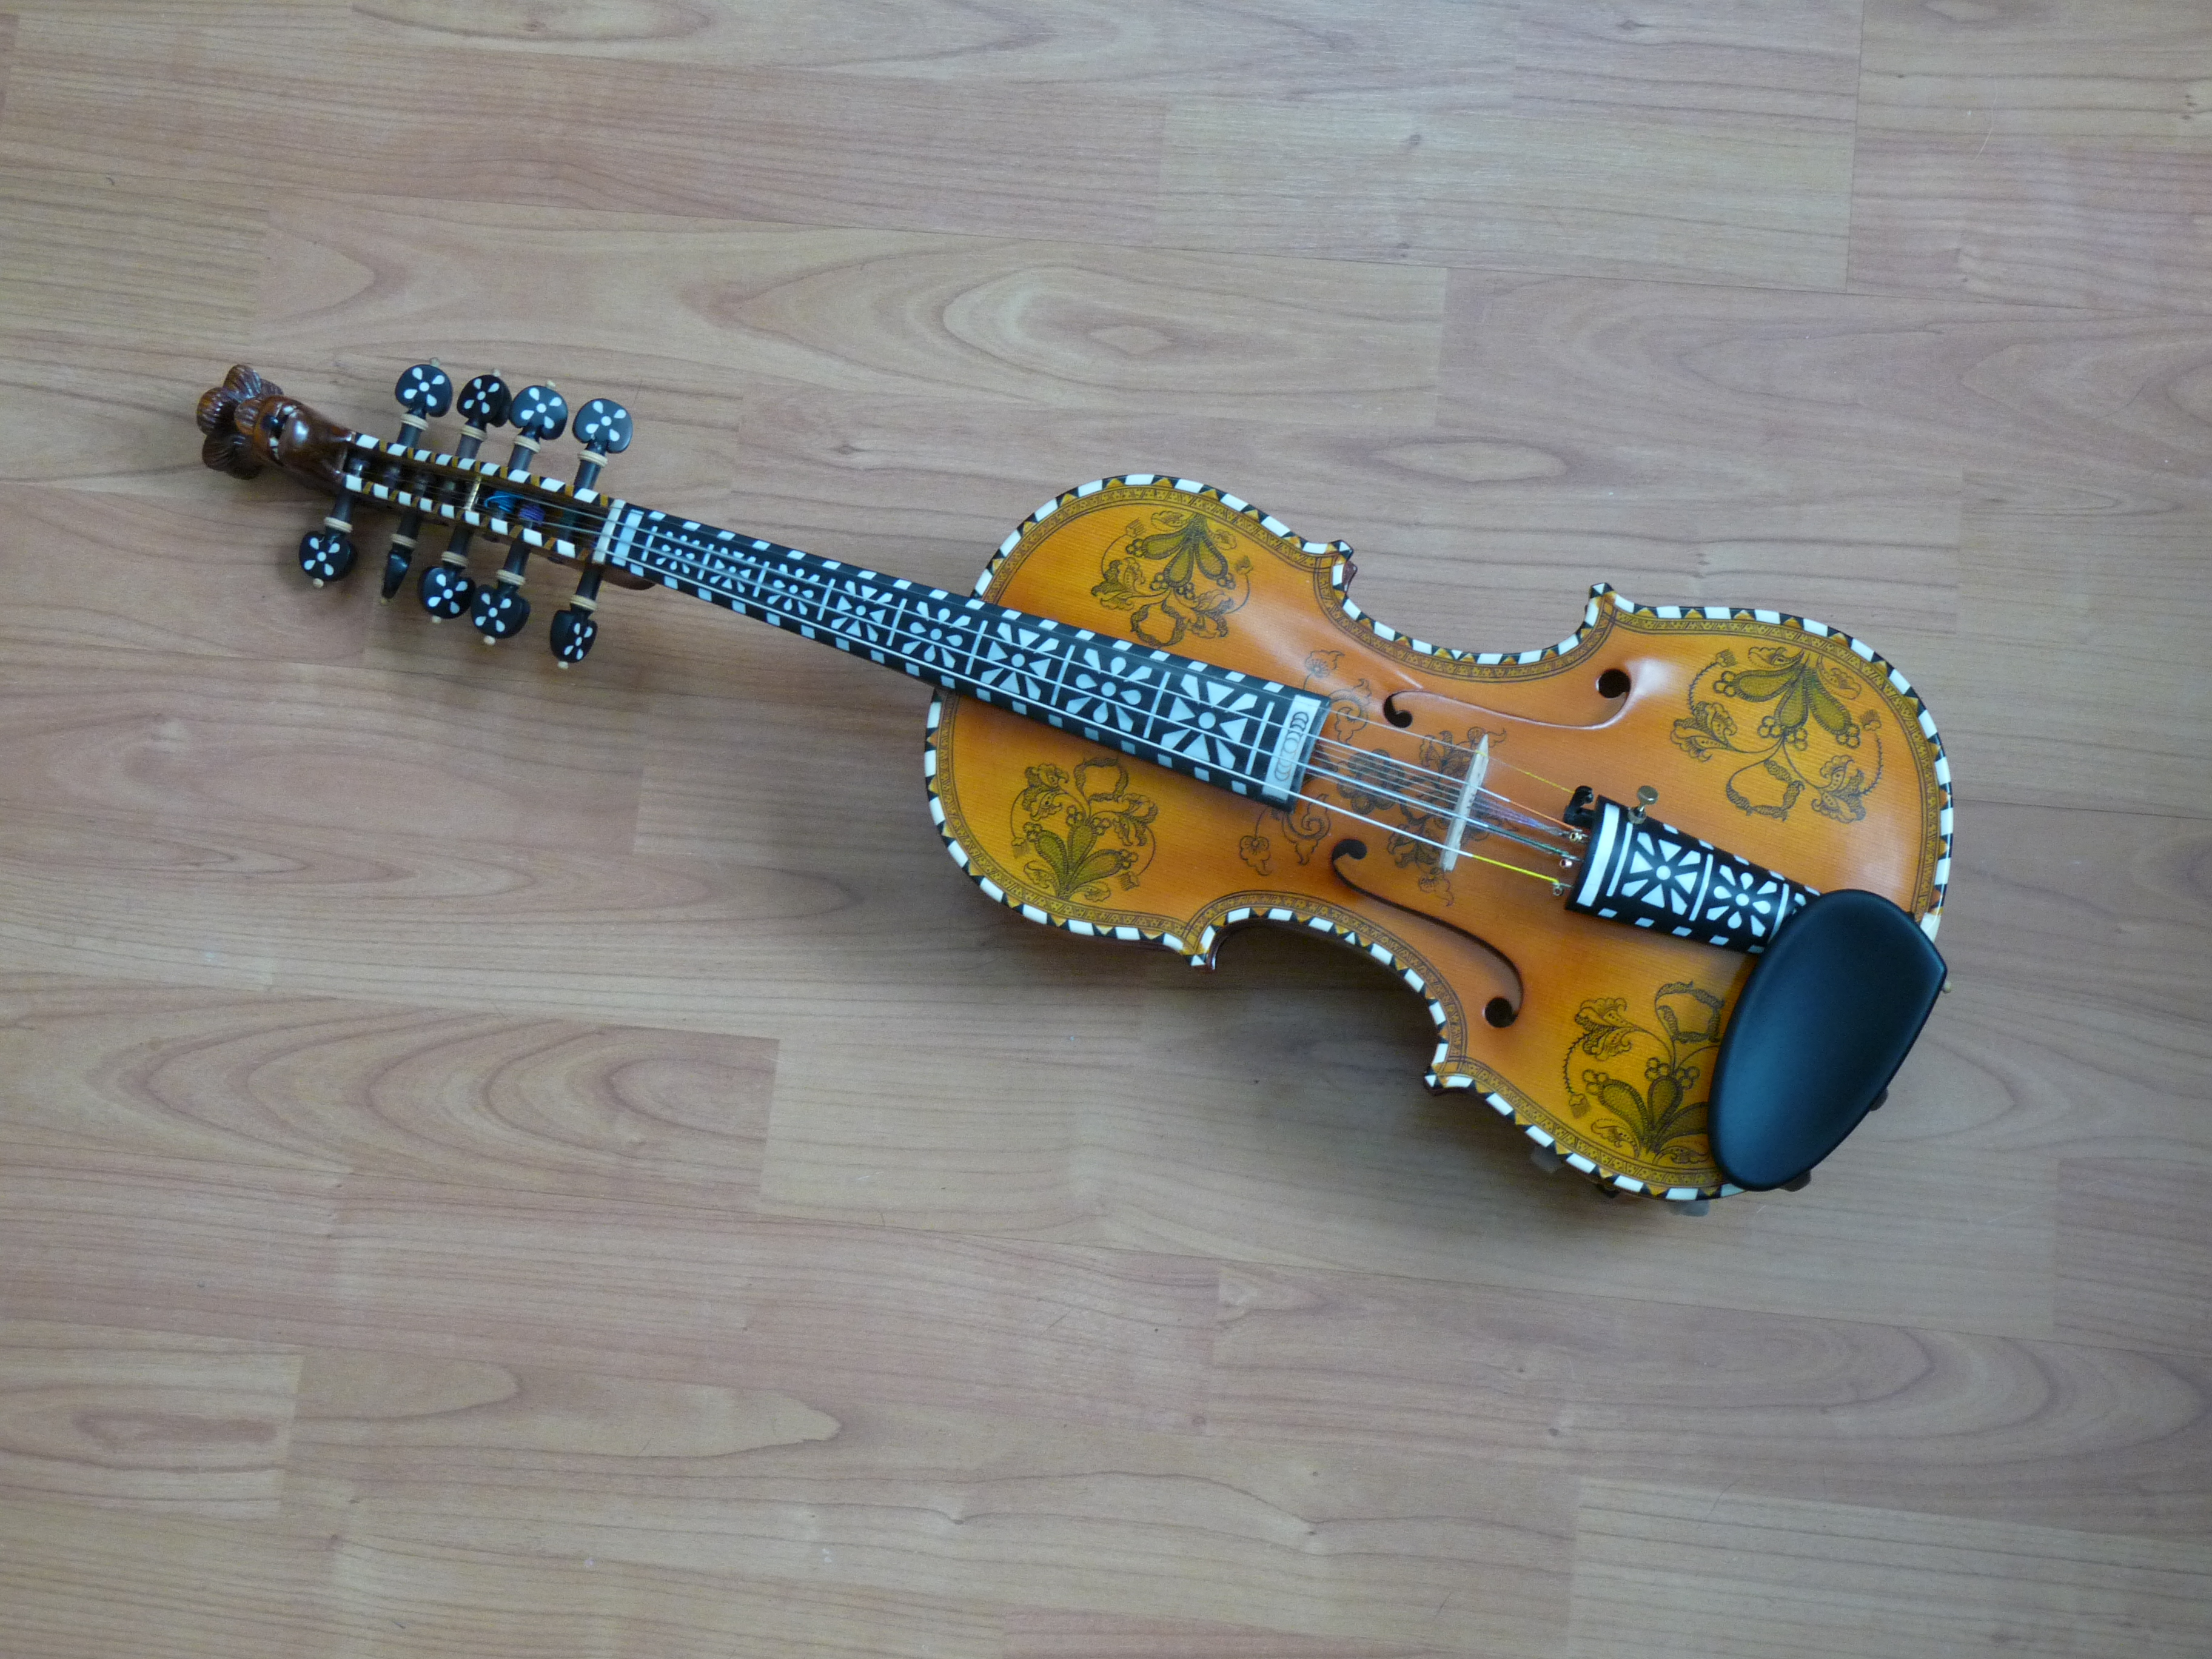
Altfiolen framifrån
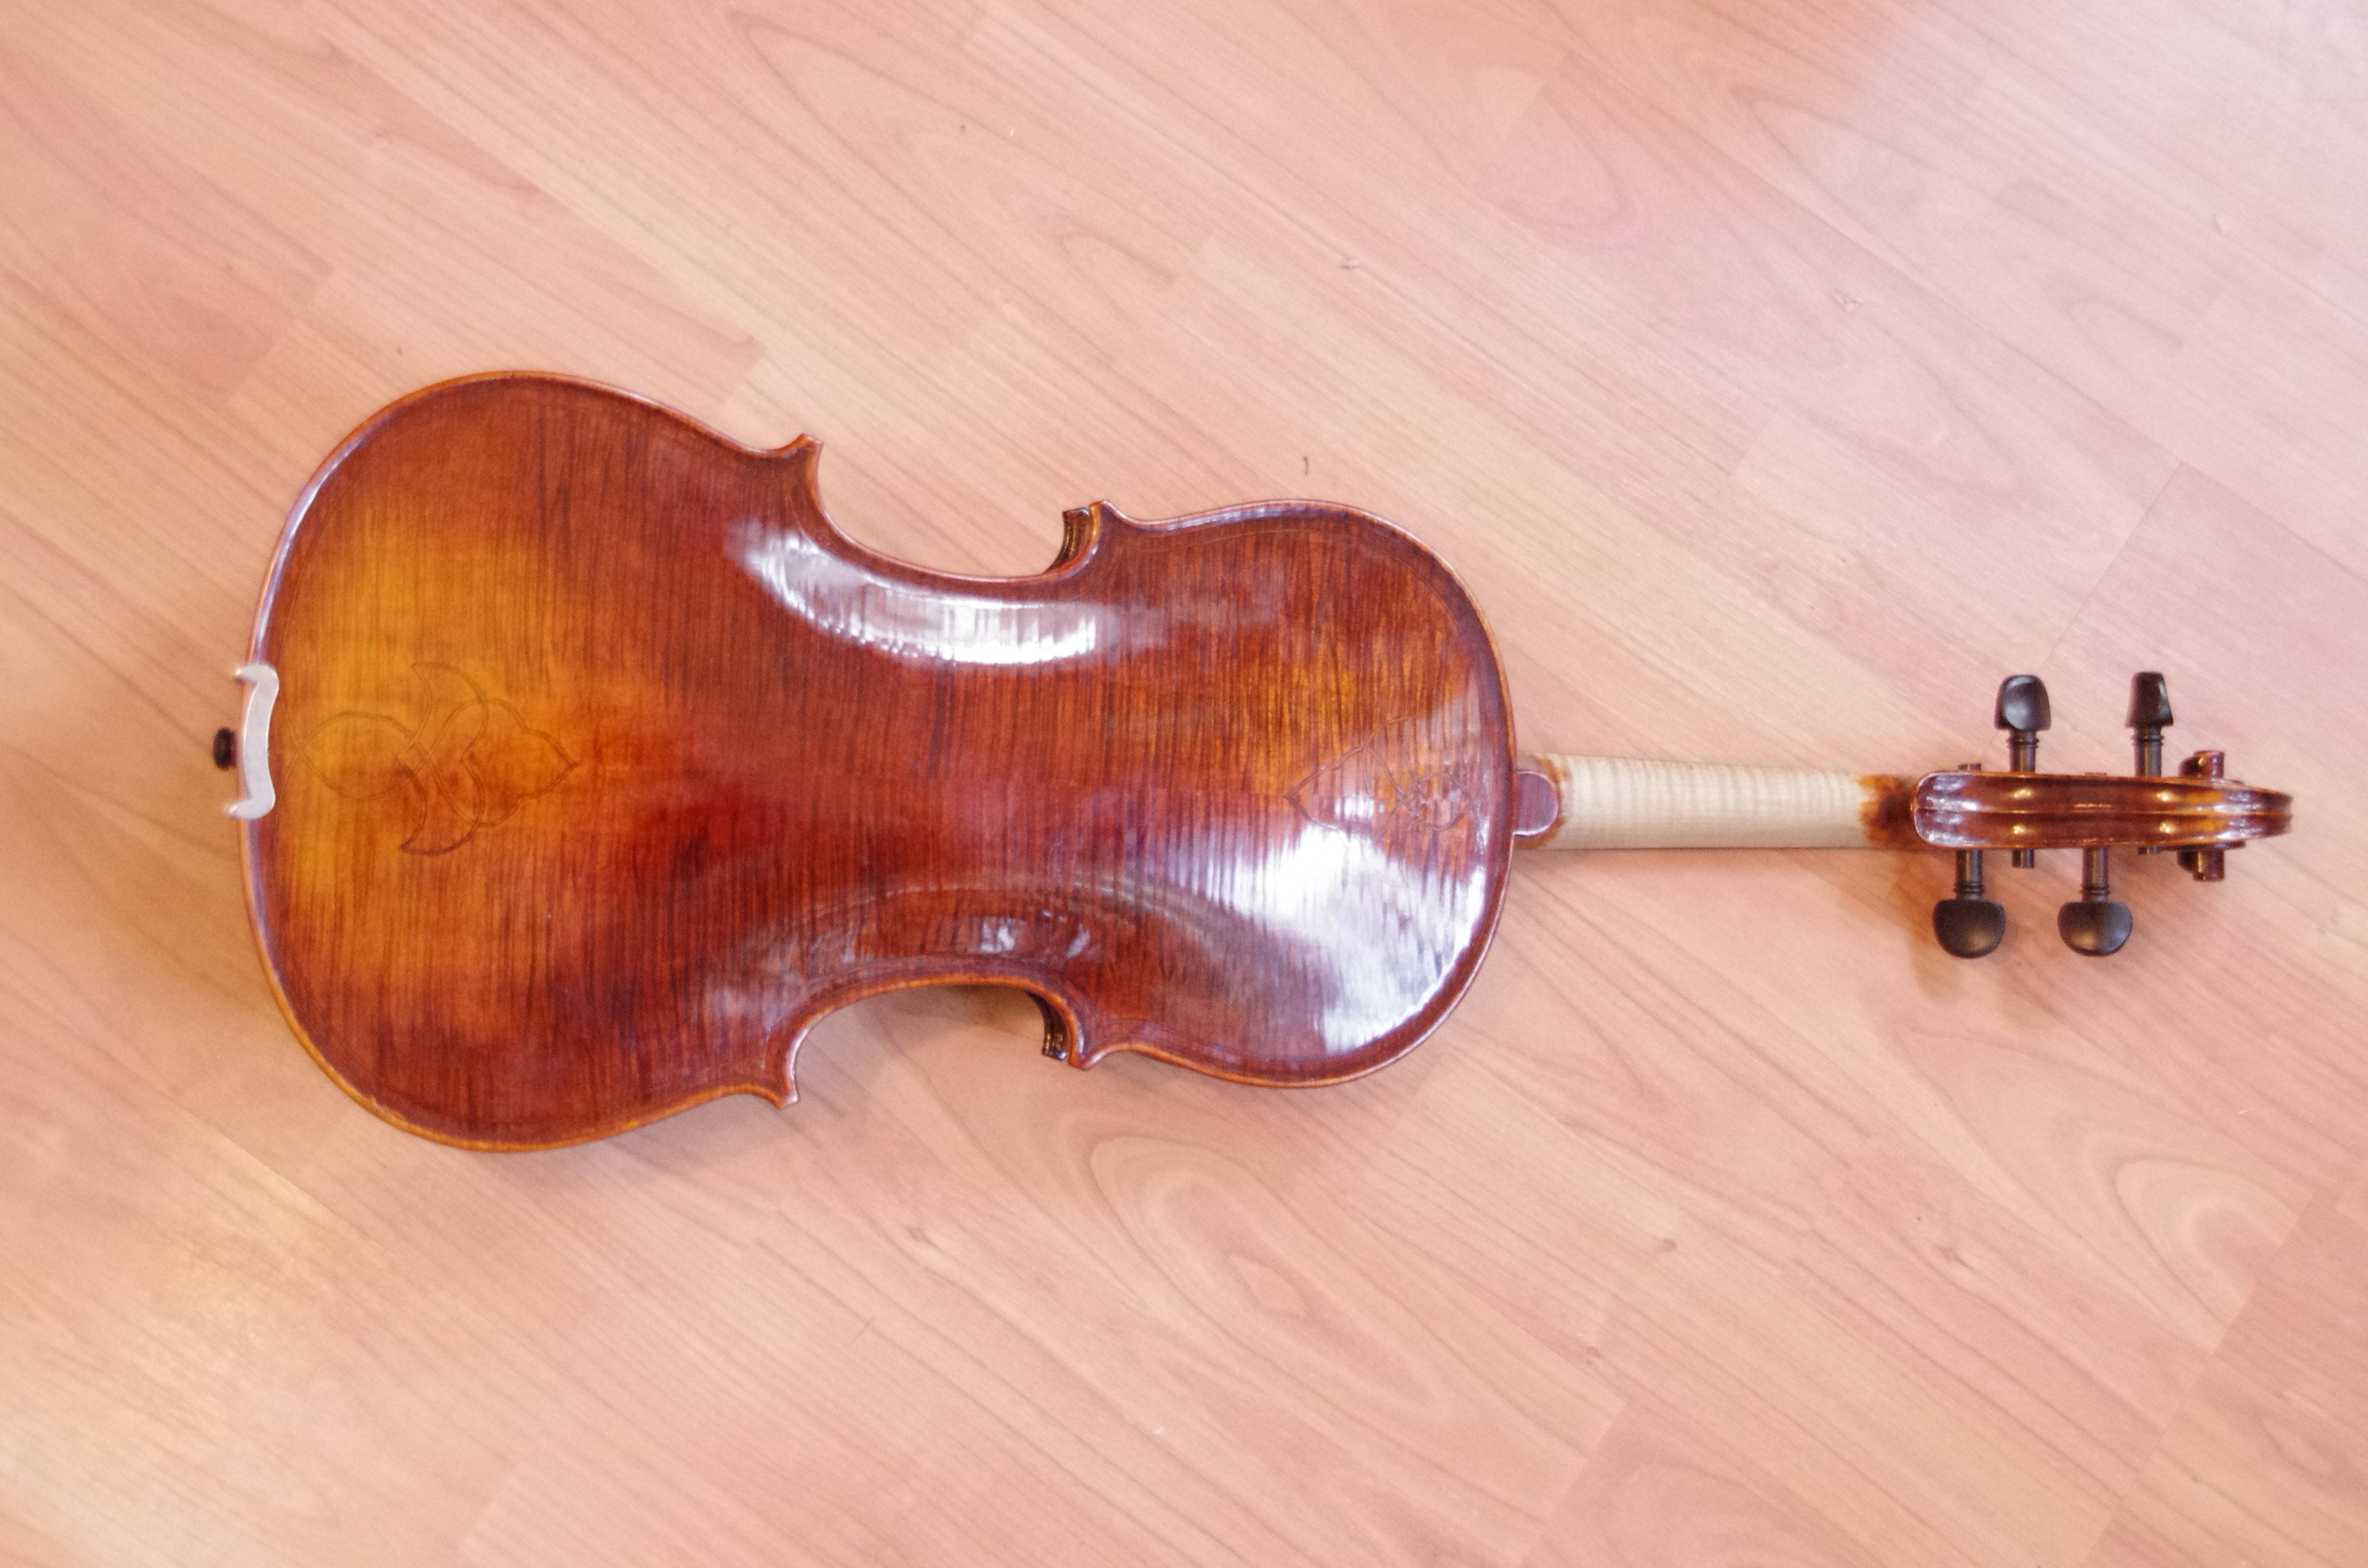
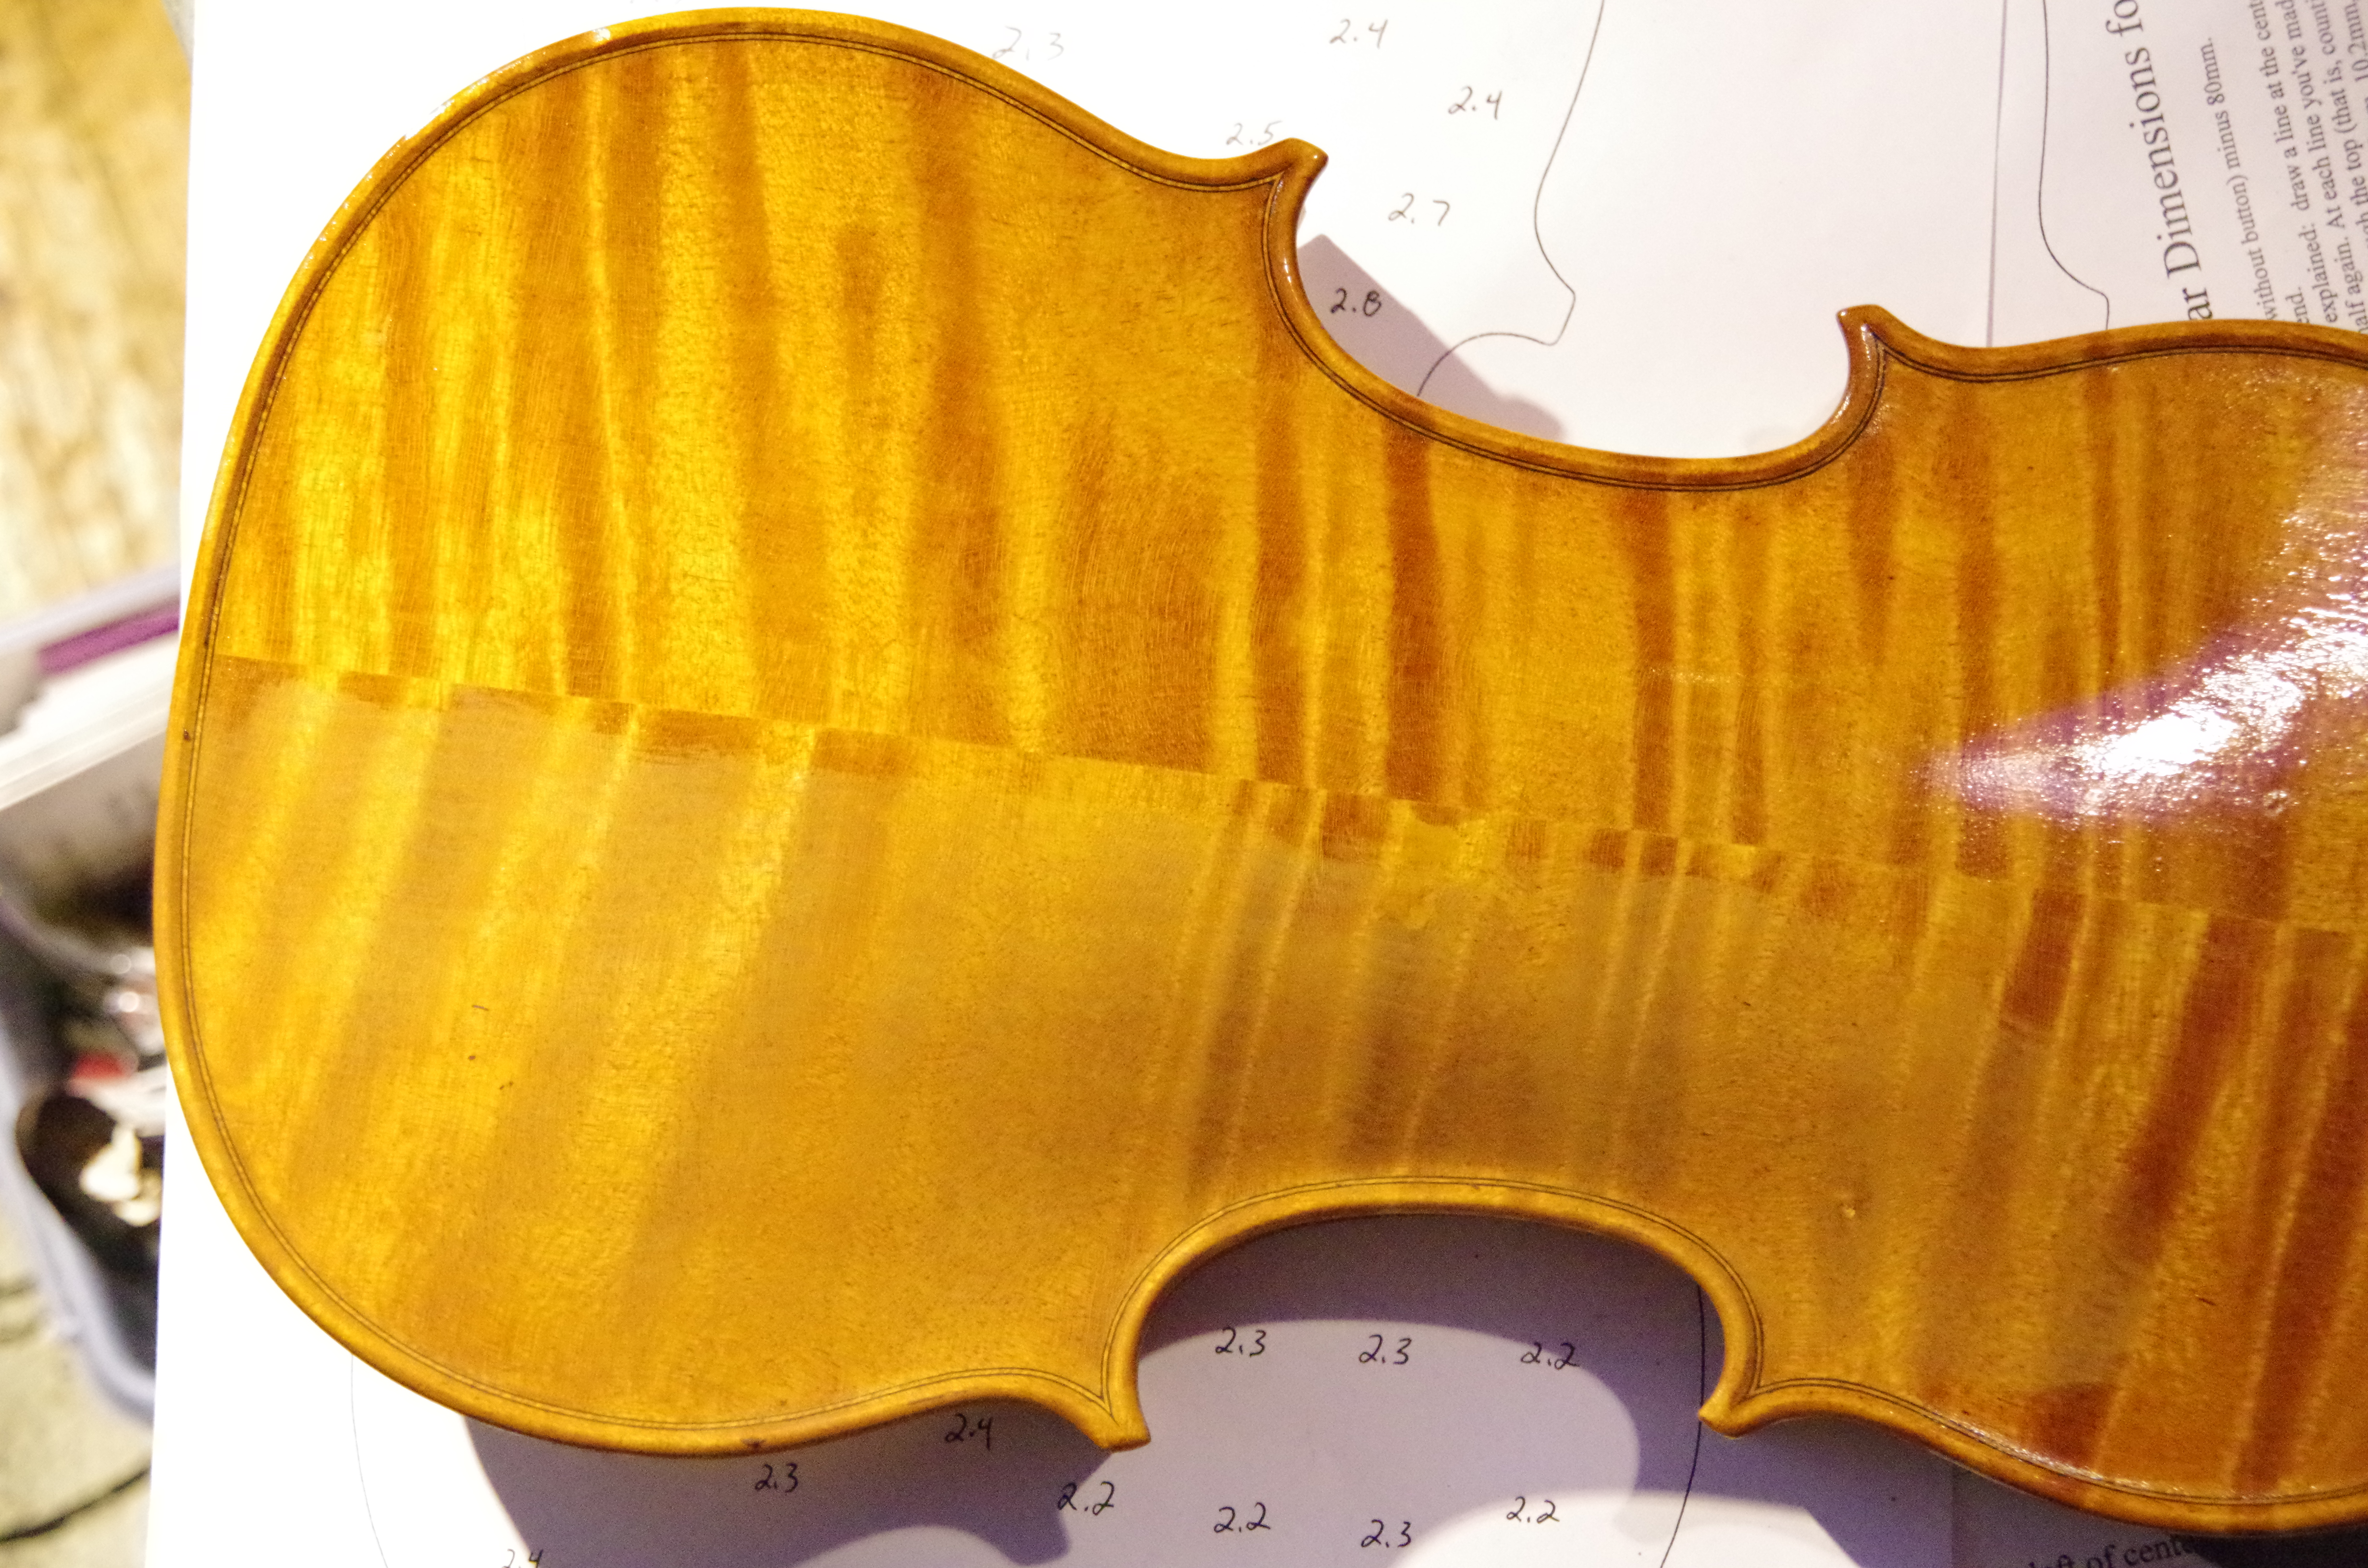
Altfiolen bakifrån
Om mätningarna
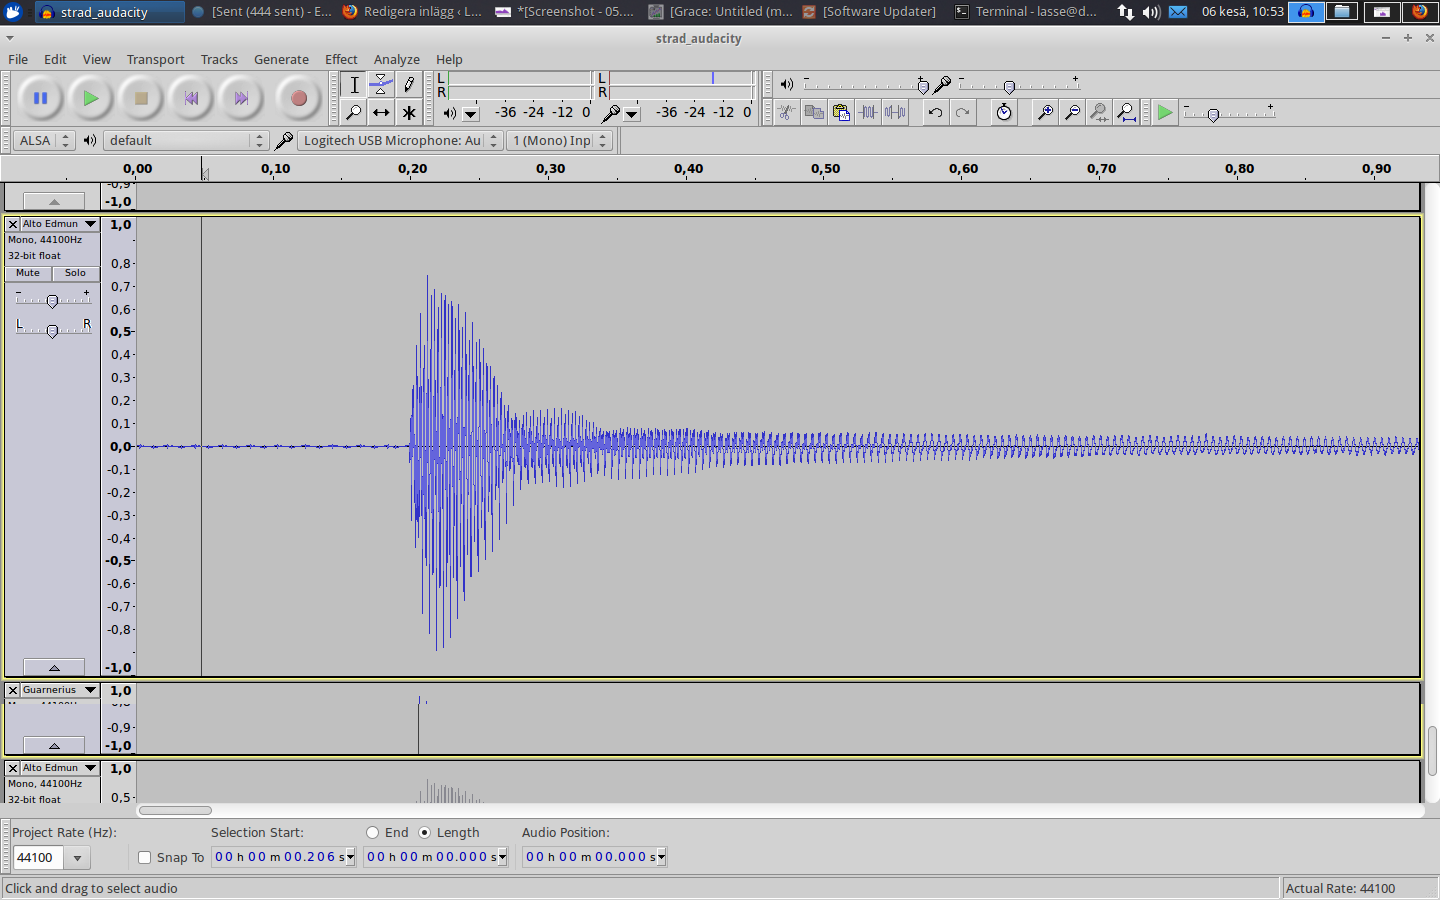
Alla mätningar har gjorts så att jag spelar en skala upp från låga C till D på A-strängen och därifrån ner igen till C. Vid inspelningen har jag använt en Logitech USB mikrofon som på intet sätt är perfekt men den fungerar inom det frekvensområde, 200 Hz – 6 kHz, som intresserar mig.
Fördelen med att spela en långsam skala jämfört med att göra ett knacktest på stallet är att man tydligare ser en specifik tons övertoner och framför allt amplitudförhållandet mellan övertonerna. De harmoniska övertonerna ger instrumentet dess klang.
C-strängen tonen F
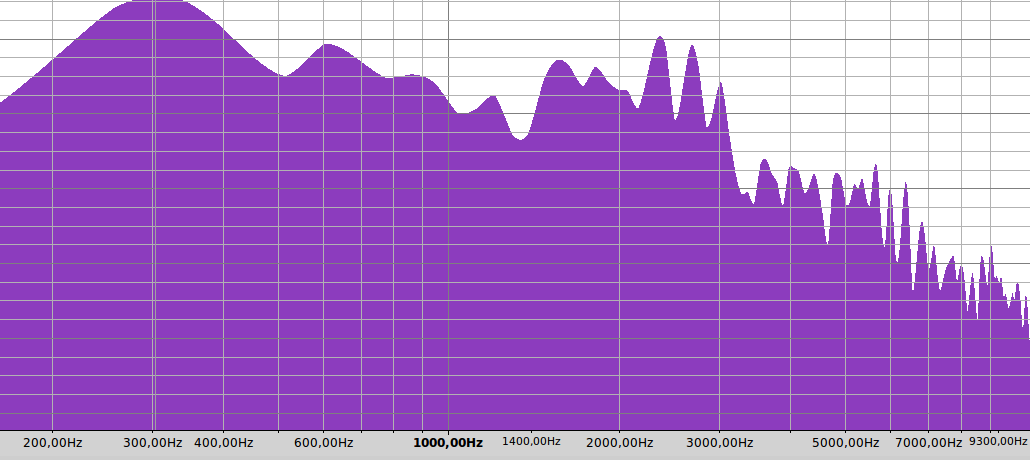
Utgångsläget innan några som helst justeringar har gjorts visas i fig. 1.
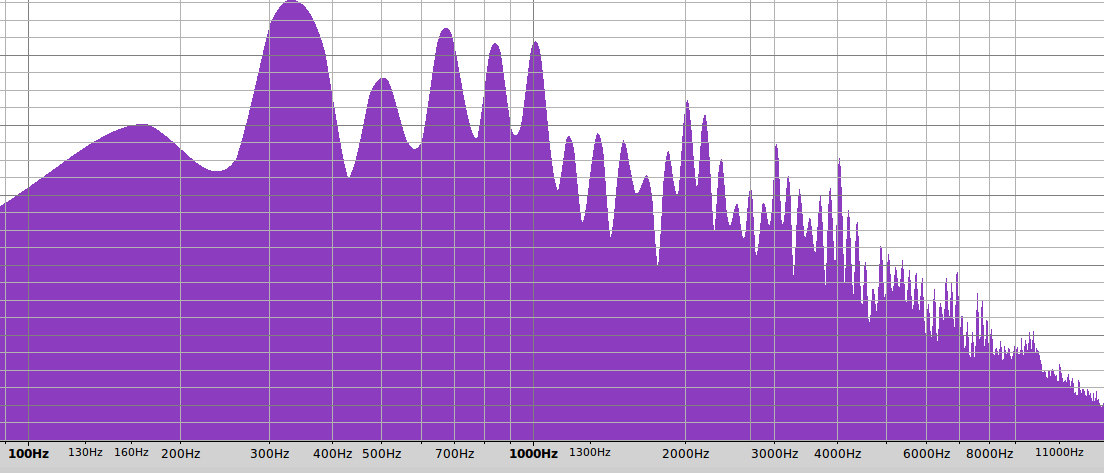
Fig. 1 Tonen F på C-strängen spelad innan någon korrigering gjorts.
Notera hur övertonen F7 (den mittersta och högsta toppen i gropen mellan 2-3 kHz) ligger 33 dB under oktaven F4 mellan 300-400 Hz. Grundtonen F3 ligger itrakten av 180 Hz och den är svag.
Jag knackade runt på ringmoden på bottenplattan med altfiolen stämd och spelbar. Resultatet var att tvärnoden nere under stränghållaren hade en låh knackton jämfört med mitten av locket och tvärnoden uppe nära halsen (som även den var något låg).
Jag gjorde en första grovjustering genom att slipa tvärnoden nere 300 drag, uppe vid noden vid halsen 100 drag och noden vid C-bågarna 100 drav var. Provspelning efter slipningen gav en ”menlös” rätt tråkig ton utan sting. Situationen ordnade sig dock av sig själv antagligen till följd av att de slipade platserna svalnade och eventuellt ytlagret hårdnade. Efter 15 minuter kunde man tydligt höra en förbättring jämfört med utgångsläget.
Mätningar visade att området 3-5 kHz hade stigit med ca. 3 dB jämfört med grundregistret 200 – 1000 Hz.
Slipade ytterligare +100 drag efter några timmars paus.
Slipade noden vid C-bågarna i bottenplattan. Det här gav en försämring så att tonen blev torrare och strävare. Man skall helt tydligt vara försiktig med att röra området i trakten av C-bågarna. Dessa områden lämnas ofta relativt tjocka av byggare.
Balanserade f-hålens vingar ett första varv. Jag slipar vingen från insidan så att man får en jämnt sjunkande ton då man knackar från vingspetsen ner mot fiolens nedre del eller upp mot halsen. Min uppfattning är att en mjuk knacktonsövergång låter vingen koppla till ett större frekvensintervall utan att endast vissa toner förstärks.
Frovspelning visade att tonen på C- och G-strängarna fortfarande var något torr/sträv men utan den varma hartzighet jag vill ha. Lösningen är att slipa tvärs över nere vilket tar bort torrheten och ger lite mera värme och skärpa i tonen. Slipade 100 drag nere. Ett problem vid slipningen under stränghållaren är att den här fiolen har två frimärken som förstärker mittlimfogen. Eftersom frimärket låg mitt på den nod jag ville slipa slipade jag en lång ellips runt förstärkningsfrimärket. Resultatet var det förväntade och tonen blev bättre.
Jag tog nu loss stallet och tunnade av det något upptill. Resultatet är att vi flyttar stallets huvudresonans högre upp i frekvens vilket förstärker området 2-4 kHz som ger brillians åt tonen. Jag värmebehandlade stallet i en aluminiumkastrull så att jag lade stallet i kastrullen (torr!) och värmde den på full effekt på elspisen. Då temperaturen nådde 130 grader C flyttade jag bort kastrullen från plattan och lät stallet långsamt svalna i kastrullen. Sidan upp mot halsen värmdes mycket försiktigt endast så att stallet inte skulle slå sig. Temperaturgränsen 130 grader var antasgligen onödigt hög. Nästa gång värmer jag till 120 grader C eftersom dagens uppvärmning gav synliga färgförändringar.

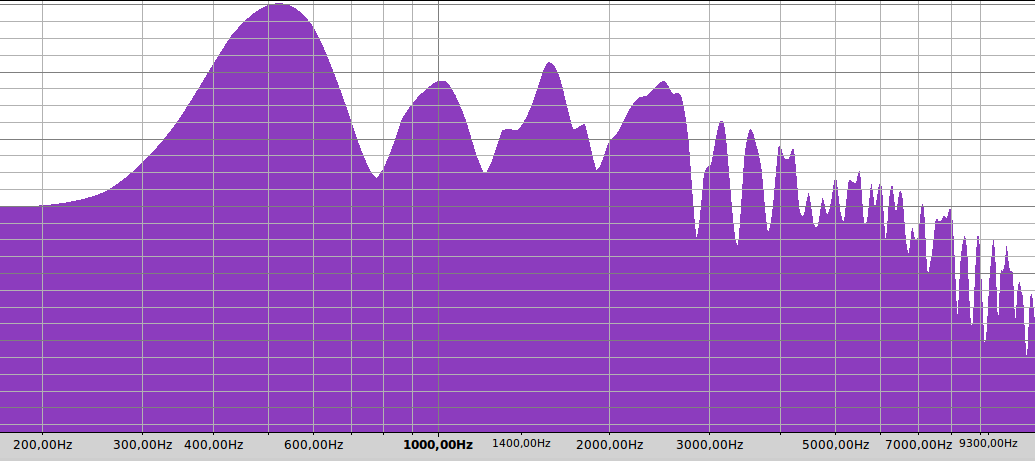
Fig. 2 Situationen efter värmebehandling av stallet.
Notera hur området 2-3 kHz har vuxit kraftigt, detta område ger ”must”, ”klang” åt den spelade grundtonen.
G- och D-strängarna kändes något svaga jämfört med C- och A-strängarna. Detta åtgärdades genom att försiktigt med stallet på plats vidga hålen i stallets hjärta. Hålet under D-strängen påverkar mera klangen i G-strängen och hålet under G-strängen påverkar klangen i D-strängen. Justeringen gav det förväntade resultatet.
Jag slipade ytterligare +100 drag i noden nere för att ge bättre klang i C- och G-strängarna.
Jag jämnade ut A-sidans inre vinge som lät låg nära stallet. En lätt slipning om 40 drag med liten magnet fixade detta.
Slutresultat:

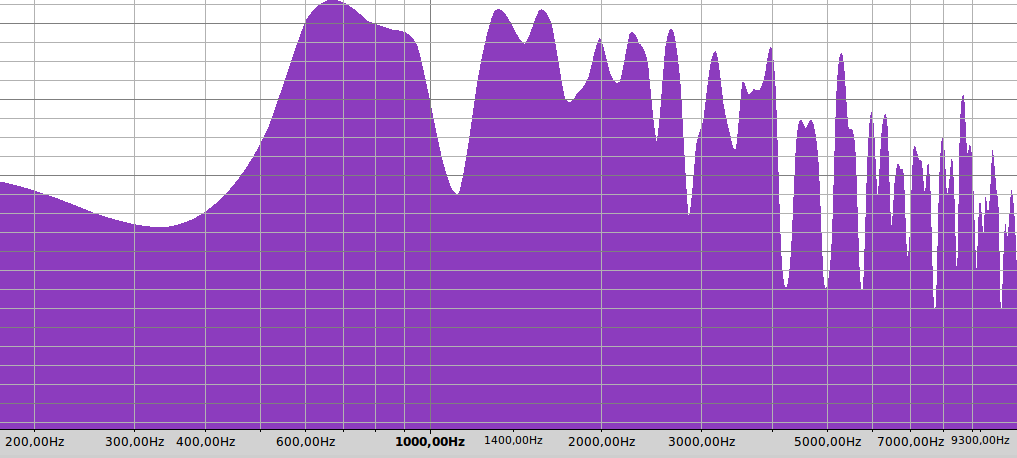
Fig. 3 Slutresultat för denna omgång.
Notera hur området 2-3 kH har stigit kraftigt jämfört med utgångspunkten.